Tag

eclipse

Browsing

Here’s an example of an Android application that allows users to choose an image from the camera or gallery and perform cropping functionality using the “Android Image Cropper” library.

Step 1: Set up the project

Start by creating a new Android project in Android Studio. Make sure you have the necessary dependencies and permissions in your project’s build.gradle file:

dependencies {
    implementation 'com.theartofdev.edmodo:android-image-cropper:2.8.+'
}

Also, make sure you have the necessary permissions in your AndroidManifest.xml file:

<uses-permission android:name="android.permission.READ_EXTERNAL_STORAGE" />
<uses-permission android:name="android.permission.WRITE_EXTERNAL_STORAGE" />
<uses-permission android:name="android.permission.CAMERA" />

Step 2: Create the layout

Create a layout file called activity_main.xml with the following code:

<RelativeLayout xmlns:android="http://schemas.android.com/apk/res/android"
    xmlns:tools="http://schemas.android.com/tools"
    android:layout_width="match_parent"
    android:layout_height="match_parent"
    android:paddingLeft="16dp"
    android:paddingTop="16dp"
    android:paddingRight="16dp"
    android:paddingBottom="16dp"
    tools:context=".MainActivity">

    <ImageView
        android:id="@+id/imageView"
        android:layout_width="match_parent"
        android:layout_height="wrap_content"
        android:adjustViewBounds="true"
        android:scaleType="centerInside"
        android:src="@drawable/placeholder" />

    <Button
        android:id="@+id/btnChooseImage"
        android:layout_width="wrap_content"
        android:layout_height="wrap_content"
        android:layout_below="@id/imageView"
        android:text="Choose Image" />

    <Button
        android:id="@+id/btnCropImage"
        android:layout_width="wrap_content"
        android:layout_height="wrap_content"
        android:layout_below="@id/btnChooseImage"
        android:text="Crop Image"
        android:enabled="false" />

</RelativeLayout>

Step 3: Implement the functionality in the MainActivity

Open MainActivity.java and add the following code:

import android.Manifest;
import android.content.Intent;
import android.content.pm.PackageManager;
import android.graphics.Bitmap;
import android.net.Uri;
import android.os.Bundle;
import android.provider.MediaStore;
import android.view.View;
import android.widget.Button;
import android.widget.ImageView;

import androidx.annotation.NonNull;
import androidx.appcompat.app.AppCompatActivity;
import androidx.core.app.ActivityCompat;
import androidx.core.content.ContextCompat;

import com.theartofdev.edmodo.cropper.CropImage;
import com.theartofdev.edmodo.cropper.CropImageView;

import java.io.IOException;

public class MainActivity extends AppCompatActivity {

    private static final int REQUEST_CAMERA_PERMISSION = 200;
    private static final int REQUEST_IMAGE_CAPTURE = 100;
    private static final int REQUEST_IMAGE_GALLERY = 101;

    private ImageView imageView;
    private Button btnChooseImage;
    private Button btnCropImage;

    private Uri imageUri;

    @Override
    protected void onCreate(Bundle savedInstanceState) {
        super.onCreate(savedInstanceState);
        setContentView(R.layout.activity_main);

        imageView = findViewById(R.id.imageView);
        btnChooseImage = findViewById(R.id.btnChooseImage);
        btnCropImage = findViewById(R.id.btnCropImage);

        btnChooseImage.setOnClickListener(new View.OnClickListener() {
            @Override
            public void onClick(View v) {
                chooseImage();
            }
        });

        btnCropImage.setOnClickListener(new View.OnClickListener() {
            @Override
            public void onClick(View v) {
                cropImage(imageUri);
            }
        });
    }

    private void chooseImage() {
        if (ContextCompat.checkSelfPermission(this, Manifest.permission.CAMERA) != PackageManager.PERMISSION_GRANTED) {
            ActivityCompat.requestPermissions(this, new String[]{Manifest.permission.CAMERA}, REQUEST_CAMERA_PERMISSION);
        } else {
            openImageChooser();
        }
    }

    private void openImageChooser() {
        Intent intent = new Intent(Intent.ACTION_GET_CONTENT);
        intent.setType("image/*");
        startActivityForResult(intent, REQUEST_IMAGE_GALLERY);
    }

    private void cropImage(Uri imageUri) {
        CropImage.activity(imageUri)
                .setGuidelines(CropImageView.Guidelines.ON)
                .setAspectRatio(1, 1)
                .start(this);
    }

    @Override
    protected void onActivityResult(int requestCode, int resultCode, Intent data) {
        super.onActivityResult(requestCode, resultCode, data);

        if (requestCode == REQUEST_IMAGE_CAPTURE && resultCode == RESULT_OK) {
            cropImage(imageUri);
        } else if (requestCode == REQUEST_IMAGE_GALLERY && resultCode == RESULT_OK && data != null) {
            try {
                Bitmap bitmap = MediaStore.Images.Media.getBitmap(getContentResolver(), data.getData());
                imageView.setImageBitmap(bitmap);
                imageUri = data.getData();
                btnCropImage.setEnabled(true);
            } catch (IOException e) {
                e.printStackTrace();
            }
        } else if (requestCode == CropImage.CROP_IMAGE_ACTIVITY_REQUEST_CODE) {
            CropImage.ActivityResult result = CropImage.getActivityResult(data);
            if (resultCode == RESULT_OK) {
                Uri resultUri = result.getUri();
                try {
                    Bitmap croppedBitmap = MediaStore.Images.Media.getBitmap(getContentResolver(), resultUri);
                    imageView.setImageBitmap(croppedBitmap);
                } catch (IOException e) {
                    e.printStackTrace();
                }
            } else if (resultCode == CropImage.CROP_IMAGE_ACTIVITY_RESULT_ERROR_CODE) {
                Exception error = result.getError();
                error.printStackTrace();
            }
        }
    }

    @Override
    public void onRequestPermissionsResult(int requestCode, @NonNull String[] permissions, @NonNull int[] grantResults) {
        super.onRequestPermissionsResult(requestCode, permissions, grantResults);
        if (requestCode == REQUEST_CAMERA_PERMISSION && grantResults.length > 0 && grantResults[0] == PackageManager.PERMISSION_GRANTED) {
            openImageChooser();
        }
    }
}

That’s it! Now you have an Android application that allows users to choose an image from the camera or gallery and perform cropping functionality. Remember to replace the placeholder image with an actual placeholder image of your choice.

Note: Don’t forget to add the necessary runtime permissions check in your code to handle permissions for accessing the camera and gallery.

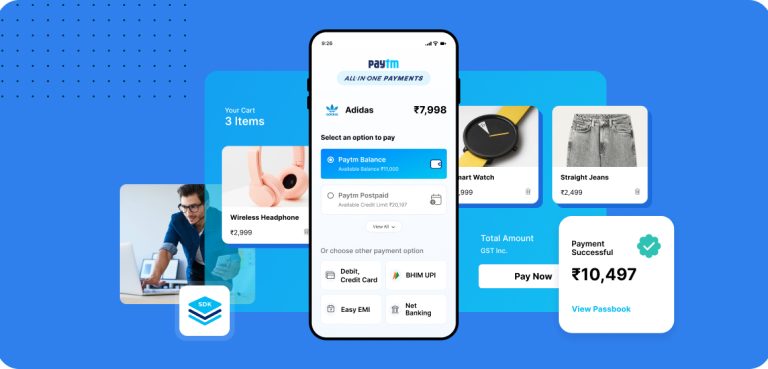
Step 1: Sign up for a Paytm merchant account
To integrate the PayTM payment gateway, you need to sign up for a PayTM merchant account. Visit the PayTM Developer Portal (https://developer.paytm.com/) and follow the registration process to create your merchant account.

Step 2: Set up PayTM SDK in your project

  1. Open your Android project in Android Studio.
  2. Add the following dependency to your app-level build. gradle file:
implementation 'com.paytm:pgplussdk:1.4.3'
  1. Sync your project to download the PayTM SDK.

Step 3: Obtain merchant credentials
After signing up for a merchant account, you will receive the necessary credentials from PayTM. These include the merchant ID and merchant key, which you’ll need for integration.

Step 4: Create a PayTM activity
Create a new activity in your Android project to handle the PayTM payment process. For example, create a PaytmActivity.java file.

Step 5: Implement the PayTM payment process
In the PaytmActivity.java file, implement the following steps:

  1. Initialize the PayTM service in the onCreate() method:
PaytmPGService service = PaytmPGService.getStagingService(); // or PaytmPGService.getProductionService() for production environment
  1. Set up the payment parameters and listener:
HashMap<String, String> paramMap = new HashMap<>();
paramMap.put("MID", "YOUR_MERCHANT_ID");
paramMap.put("ORDER_ID", "UNIQUE_ORDER_ID");
paramMap.put("CUST_ID", "CUSTOMER_ID");
paramMap.put("CHANNEL_ID", "WAP");
paramMap.put("TXN_AMOUNT", "AMOUNT");
paramMap.put("WEBSITE", "WEBSTAGING"); // for staging environment, use "DEFAULT" for production
paramMap.put("INDUSTRY_TYPE_ID", "Retail");
paramMap.put("CALLBACK_URL", "CALLBACK_URL"); // the URL to which PayTM will send the payment response

PaytmOrder order = new PaytmOrder(paramMap);

service.initialize(order, null);

Replace the placeholders with the appropriate values from your merchant account.

  1. Start the payment transaction:
service.startPaymentTransaction(this, true, true, new PaytmPaymentTransactionCallback() {
    @Override
    public void onTransactionResponse(Bundle inResponse) {
        // Handle the payment response
    }

    @Override
    public void networkNotAvailable() {
        // Handle network error
    }

    @Override
    public void clientAuthenticationFailed(String inErrorMessage) {
        // Handle authentication error
    }

    @Override
    public void someUIErrorOccurred(String inErrorMessage) {
        // Handle UI error
    }

    @Override
    public void onErrorLoadingWebPage(int iniErrorCode, String inErrorMessage, String inFailingUrl) {
        // Handle web page loading error
    }

    @Override
    public void onBackPressedCancelTransaction() {
        // Handle transaction cancellation
    }

    @Override
    public void onTransactionCancel(String inErrorMessage, Bundle inResponse) {
        // Handle transaction cancellation
    }
});
  1. Handle the payment response in the onTransactionResponse() method:
@Override
public void onTransactionResponse(Bundle inResponse) {
    String status = inResponse.getString("STATUS");
    String message = inResponse.getString("RESPMSG");

    if (status != null && status.equals("TXN_SUCCESS")) {
        // Payment was successful
    } else {
        // Payment failed
    }
}

Step 6: Connect the PayTM activity to your app
Finally, you need to connect the PayTM activity to your e-commerce app. For example, you can add a button to the shopping cart screen and launch the PayTM activity when the user selects the payment option.

That’s it! You have now integrated the PayTM payment gateway into your Android e-commerce app. Remember to replace the placeholder values with your actual merchant credentials and customize the code according to your app’s requirements.

Please note that this guide provides a basic integration example. For a complete and detailed implementation, including error handling and additional features, you may need to refer to the official PayTM documentation or consult their support resources.

I am Vishal Swami, mobile and web application developer. Having worked with various technologies ranging from PHP to ASP.NET to iPhone and Android of course, I in the process noticed that there are not many good blogs targeted towards beginners when it comes to mobile(android) development, hence I decided to start this blog where I can share my experience with Android development and hopefully help you guys find quick tips and good resources.

My first post is a quickie on how to get yourself started with Android development and the tools you will need to get going. So lets get started with your first basic setup for Android development.

1. Download & Install the Android SDK

a. Download the Android SDK
b. Install/Extract the downloaded SDK
c. Go to the directory where you installed the SDK and open SDK Manager to open Android SDK and AVD Manager.
d. In AVD manager under Avaliable Packages you can see different versions of SDK’s

Select SDK versions and Development tools

e. Select SDK Platform tools and one of the version of SDK and click on install

2. Downloading Eclipse Software

Although there are lot of IDE out there Eclipse is recommended IDE which will give you best support for Android app development.

You can download Eclipse IDE from here

3. Installing Android Development Toolkit (ADT) plug-in

a. Open Eclipse s/w and under Help -> Install New Software…
b. Now you will see a window which allows you to install new plug-in
c. Click on Add button and in Name and in Location give the link https://dl-ssl.google.com/android/eclipse/ and proceed with further steps.

Add plug-in Name and URL
android plug-in tools

4. Creating Sample Project

Creating a sample android project involves very few steps

a. In your Eclipse IDE go to File -> Android Project
b. Give Project Name, Select Build Target, Application Name, Package Name, Activity Name, Min SDK version and click Finish

android create new project

c. Now you can see bunch of files created in the project explorer.

Eclipse package explorer

5. Creating New Android Virtual Device (AVD)

The AVD is an emulator which provides you android hardware and software environment to test application on computer.

a. In Eclipse open SDK Manager under Windows -> Android SDK and AVD Manager

SDK AVD Manager

b. Click on New on the right side.

android virtual device

c. Give Name, Select Target give SD Card size and click on Create AVD.

android create avd

d. Now a new AVD is created with the specification you provided and Close the Android SDK and AVD Manager

6. Running the Project

Once you successfully created AVD you are ready to test your application.

a. Right Click on the project in Package Explore and click on Run As -> Android Application.

android compile app

b. Now you can see an AVD is opened and booting up.( It will take much time to launch AVD for the first time)
c. Once the AVD started you can see the output on the AVD screen.