We all know that Android Marshmallow introduced runtime permissions letting user to allow or deny any permission at runtime. Implementing runtime permissions is a tedious process and developer needs to write lot of code just to get a single permission.
In this article, we are going to simplify the process of adding the runtime permissions using Dexter library. Using this library, the permissions can be implemented in few minutes.

This is an introductory article about the Dexter covering basic features offered by the library. Dexter provides other features like using it with SnackBar, different types of listeners, error handling and few other. You can find more information on Dexter’s developer page.
1. Dexter Permissions Library
To get started with Dexter, add the dependency in your build.gradle
dependencies {
    // Dexter runtime permissions
    implementation 'com.karumi:dexter:4.2.0'
}
1.1 Requesting Single Permission
To request a single permission, you can use withPermission() method by passing the required permission. You also need a PermissionListener callback to receive the state of the permission.
> onPermissionGranted() will be called once the permission is granted.
> onPermissionDenied() will be called when the permission is denied. Here you can check whether the permission is permanently denied by using response.isPermanentlyDenied() condition.
The below code requests CAMERA permission.
Dexter.withActivity(this)
                .withPermission(Manifest.permission.CAMERA)
                .withListener(new PermissionListener() {
                    @Override
                    public void onPermissionGranted(PermissionGrantedResponse response) {
                        // permission is granted, open the camera
                    }

                    @Override
                    public void onPermissionDenied(PermissionDeniedResponse response) {
                        // check for permanent denial of permission
                        if (response.isPermanentlyDenied()) {
                            // navigate user to app settings
                        }
                    }

                    @Override
                    public void onPermissionRationaleShouldBeShown(PermissionRequest permission, PermissionToken token) {
                        token.continuePermissionRequest();
                    }
                }).check();
1.2 Requesting Multiple Permissions
To request multiple permissions at the same time, you can use withPermissions() method. Below code requests STORAGE and LOCATION permissions.
Dexter.withActivity(this)
                .withPermissions(
                        Manifest.permission.READ_EXTERNAL_STORAGE,
                        Manifest.permission.WRITE_EXTERNAL_STORAGE,
                        Manifest.permission.ACCESS_FINE_LOCATION)
                .withListener(new MultiplePermissionsListener() {
                    @Override
                    public void onPermissionsChecked(MultiplePermissionsReport report) {
                        // check if all permissions are granted
                        if (report.areAllPermissionsGranted()) {
                            // do you work now
                        }

                        // check for permanent denial of any permission
                        if (report.isAnyPermissionPermanentlyDenied()) {
                            // permission is denied permenantly, navigate user to app settings
                        }
                    }

                    @Override
                    public void onPermissionRationaleShouldBeShown(List<PermissionRequest> permissions, PermissionToken token) {
                        token.continuePermissionRequest();
                    }
                })
                .onSameThread()
                .check();
1.3 Error Handling
You can also catch any errors occurred while integrating the library using PermissionRequestErrorListener.
Dexter.withActivity(this)
                .withPermissions(
                        Manifest.permission.READ_EXTERNAL_STORAGE,
                        Manifest.permission.ACCESS_FINE_LOCATION)
                .withListener(listener)
                .withErrorListener(new PermissionRequestErrorListener() {
                    @Override
                    public void onError(DexterError error) {
                        Toast.makeText(getApplicationContext(), "Error occurred! " + error.toString(), Toast.LENGTH_SHORT).show();
                    }
                })
                .check();
Now let’s see how to use Dexter in an example project.
2. Creating New Project
1. Create a new project in Android Studio from File ⇒ New Project and select Basic Activity from templates.
2. Add Dexter dependency to your build.gradle
dependencies {
    implementation fileTree(dir: 'libs', include: ['*.jar'])
    implementation 'com.android.support:appcompat-v7:26.1.0'
    // ...

    // Dexter runtime permissions
    implementation 'com.karumi:dexter:4.2.0'
}3. Open the layout file of your main activity (activity_main.xml and content_main.xml) and add two buttons to test different permission methods.
content_main.xml
<?xml version="1.0" encoding="utf-8"?>
<RelativeLayout xmlns:android="http://schemas.android.com/apk/res/android"
    xmlns:app="http://schemas.android.com/apk/res-auto"
    xmlns:tools="http://schemas.android.com/tools"
    android:layout_width="match_parent"
    android:layout_height="match_parent"
    app:layout_behavior="@string/appbar_scrolling_view_behavior"
    tools:context="info.androidhive.dexterpermissions.MainActivity"
    tools:showIn="@layout/activity_main">

    <LinearLayout
        android:layout_width="wrap_content"
        android:layout_height="wrap_content"
        android:layout_marginTop="100dp"
        android:orientation="vertical"
        android:layout_centerHorizontal="true"
        android:paddingLeft="16dp"
        android:paddingRight="16dp">

        <Button
            android:id="@+id/btn_camera"
            android:layout_width="match_parent"
            android:layout_height="wrap_content"
            android:layout_marginBottom="16dp"
            android:text="CAMERA PERMISSION" />

        <Button
            android:id="@+id/btn_storage"
            android:layout_width="match_parent"
            android:layout_height="wrap_content"
            android:text="MULTIPLE PERMISSIONS" />

    </LinearLayout>
</RelativeLayout>4. Open MainActivity.java and do the modification as shown below.
> requestStoragePermission() requests for camera permission.
> requestStoragePermission() requests multiple permissions at once.
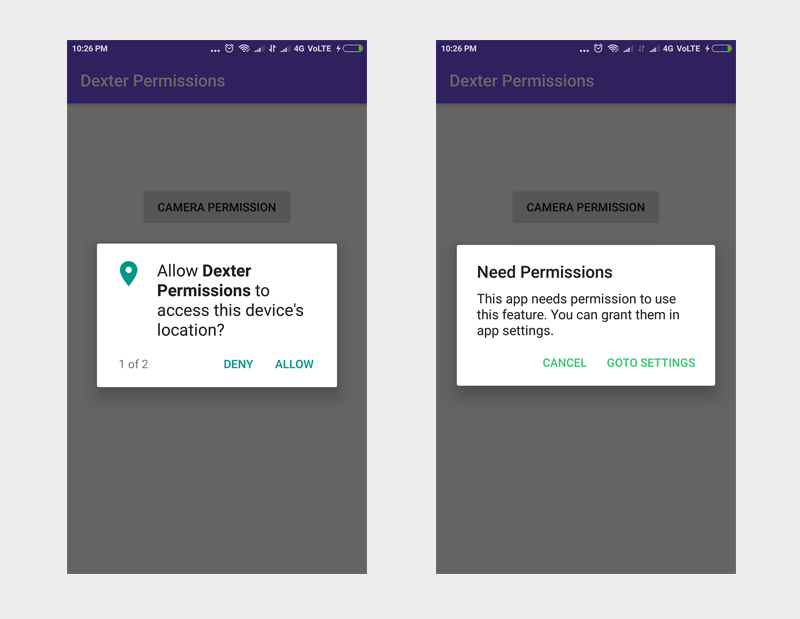
> response.isPermanentlyDenied() and report.isAnyPermissionPermanentlyDenied() checks if the permission is denied permanently. Here we have to navigate user to app settings screen by showing a dialog.
app settings
    private void openSettings() {
        Intent intent = new Intent(Settings.ACTION_APPLICATION_DETAILS_SETTINGS);
        Uri uri = Uri.fromParts("package", getPackageName(), null);
        intent.setData(uri);
        startActivityForResult(intent, 101);
    }

    private void openCamera() {
        Intent intent = new Intent(MediaStore.ACTION_IMAGE_CAPTURE);
        startActivityForResult(intent, 100);
    }
}


